
In this post, we’ll share five easy ways to improve your Moodle Course appearance. Some tips cover how to add copied HTML code to the ATTO editor, while others will need input from your Moodle Support Team, as they involve adding plugins.
Moodle LMS provides the platform for your learning content to be redesigned, so it can evolve with your organisation. With so many options for colours, fonts, GIFs and images it can be hard to know where to begin.
Remember, when using the text editor you should always adhere to accessibility standards and use the pre-formatted headings to emphasise important information. You can read more about Accessible course design on Moodle.org.
Recommendations from our E-learning consultants
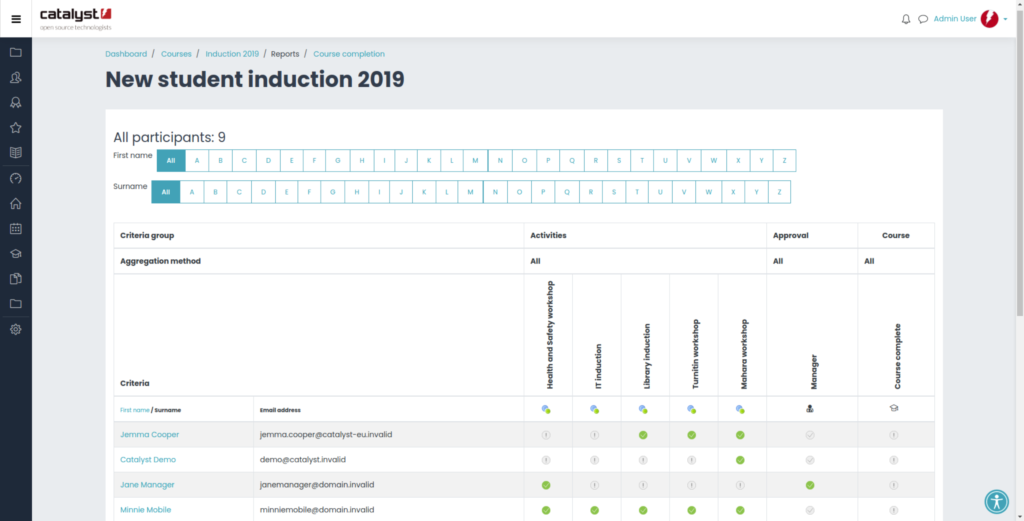
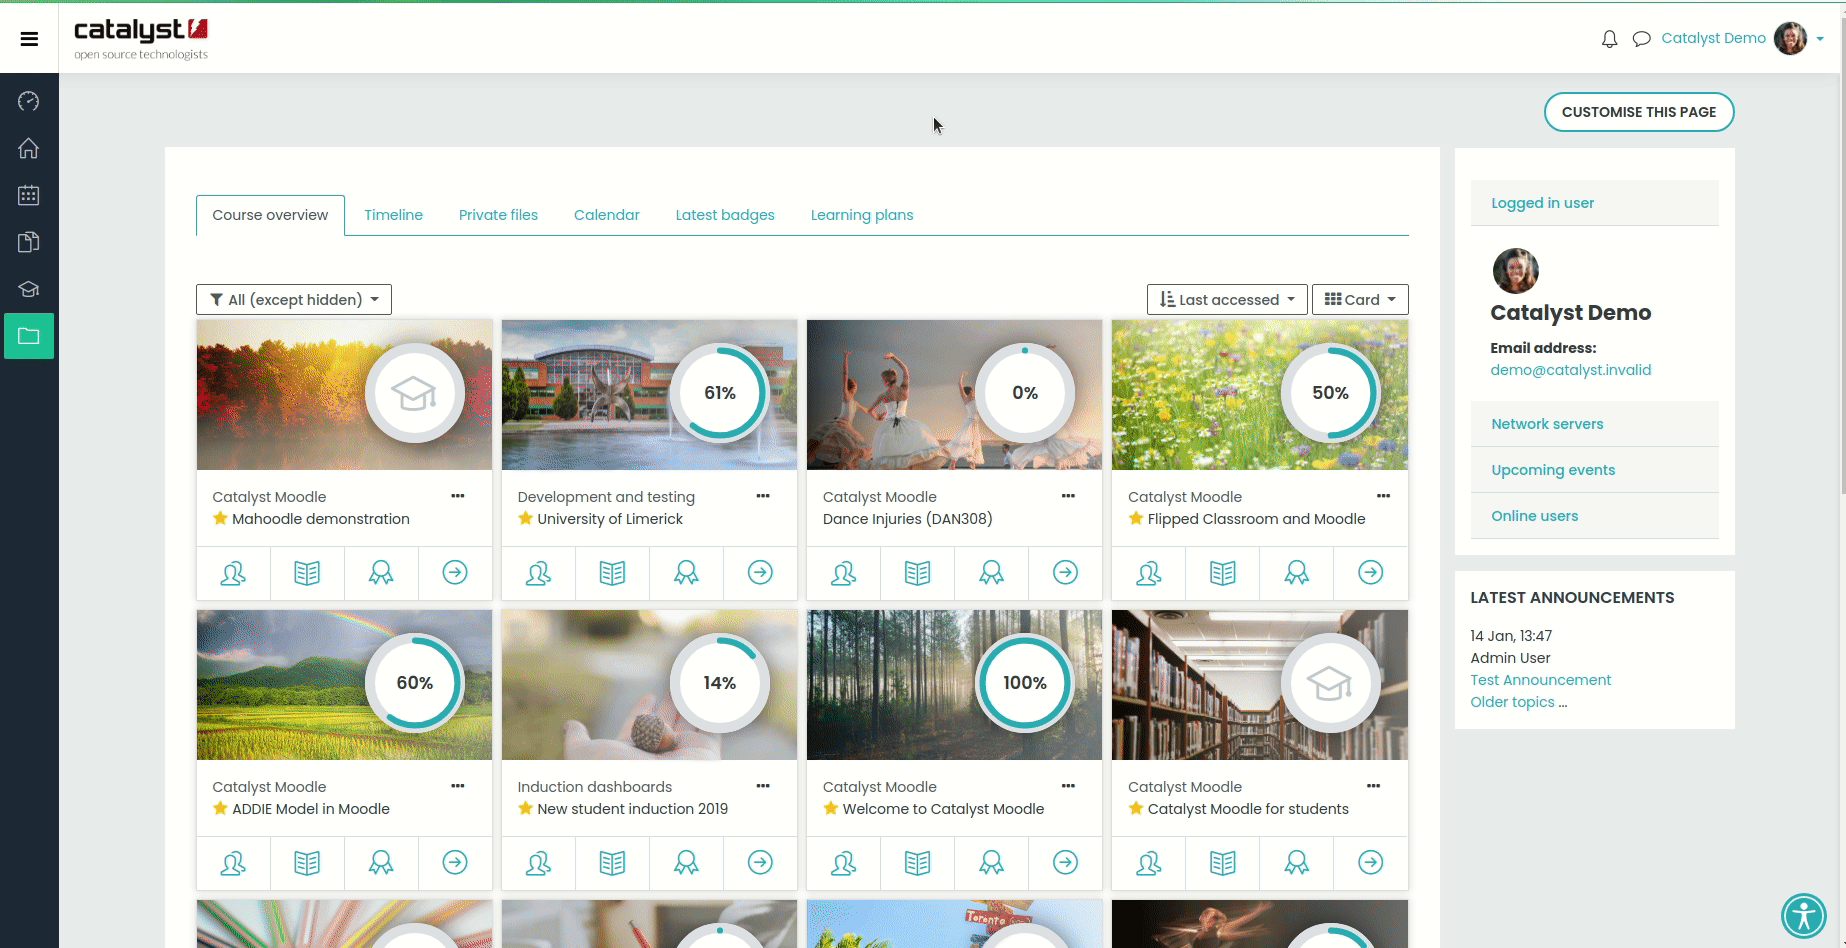
Tip 1: Use the Course Completion Status block
When completion tracking was introduced with Moodle 2.0 it was nothing short of revolutionary – informing how we created pathways for learners. The benefit of having course activities that could be tracked or restricted cannot be underestimated in its benefit to us, the course designers.
Course completion, along with the Course Completion Status block, takes this one stage further. Not only does it clearly demonstrate to the learner their progress but it allows the facilitator to track the progress of any specific class as a whole. This enables staff members to identify those meeting their requirements, and those in need of extra support – crucial crucial during and post-pandemic where online learning is vital to continuing a students education.
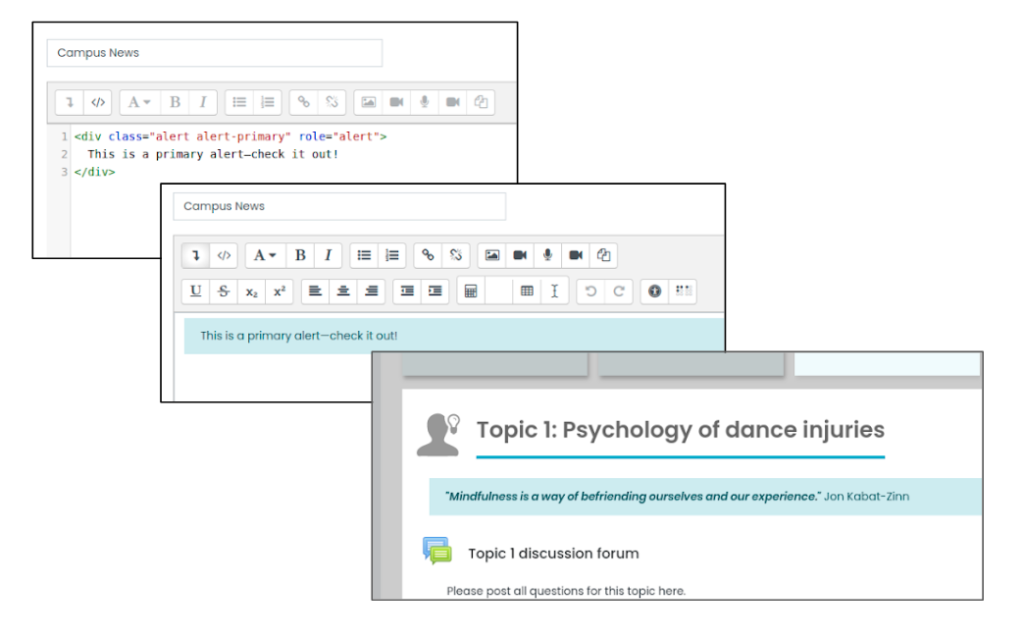
Tip 2: Use Bootstrap elements to add colours and cards to your course
Bootstrap is a mobile-first framework used to create responsive content and components. You simply copy and paste the pre-written code directly into your ATTO editor instantly updating the text, images and links you keep your course looking sharp and dynamic.
One feature we particularly like is the Alert component for creating headings and dividers. Once you have copied the code you are free to choose the colour to draw attention to the text in question. As you can see here we have used the alert component to add a mindfulness quote to each of our topics.
Cards and Jumbotrons can also help accentuate links to important resources that will be invaluable to students, helping them succeed in their studies:
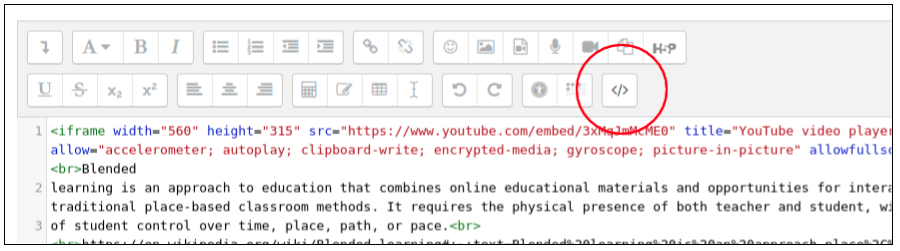
Tip 3: Embed content instead of linking to it
Embedding content has the obvious benefit of not only making your course look professional but allows the learner to access content whilst not having to navigate from the page. You, as someone with the Editing Teacher facility on your course, have the ability to embed code by copying and pasting it directly into the ATTO editor (you will need to have toggled to the HTML view first).
In addition to this, you can track the traffic to your embedded link by using the activity completion feature. By placing the embedded code in a Page rather than a label or topic overview, you can see which of your students has clicked the link and triggered the automated ‘activity completed’ notification.
Other useful tools that can be embedded within your content include Padlet (a digital post-it note for annotation), Mentimeter for crowdsourcing answers through polls) and GoogleSlides.
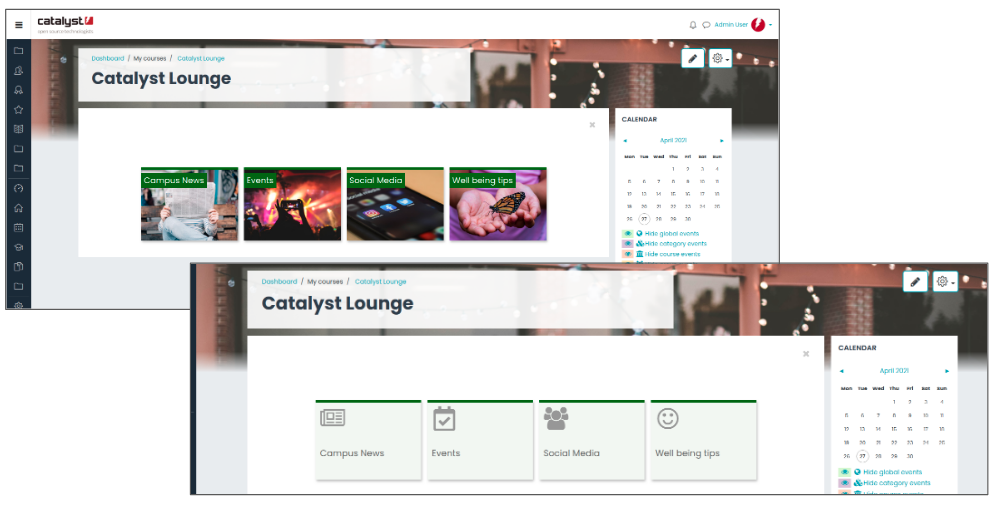
Tip 4: Install and use the Multiblock plugin
Moodle’s blocks are incredibly useful! However, they occupy a lot of space and can often distract learners from the course content. It’s for this reason the ‘Multiblock’ was created and provides a slick (and free) solution to display your blocks in a number of ways including accordion view, dropdown and tabbed display.
You can see this in action on the dashboard as tabbed display in the main content of the page shown below:
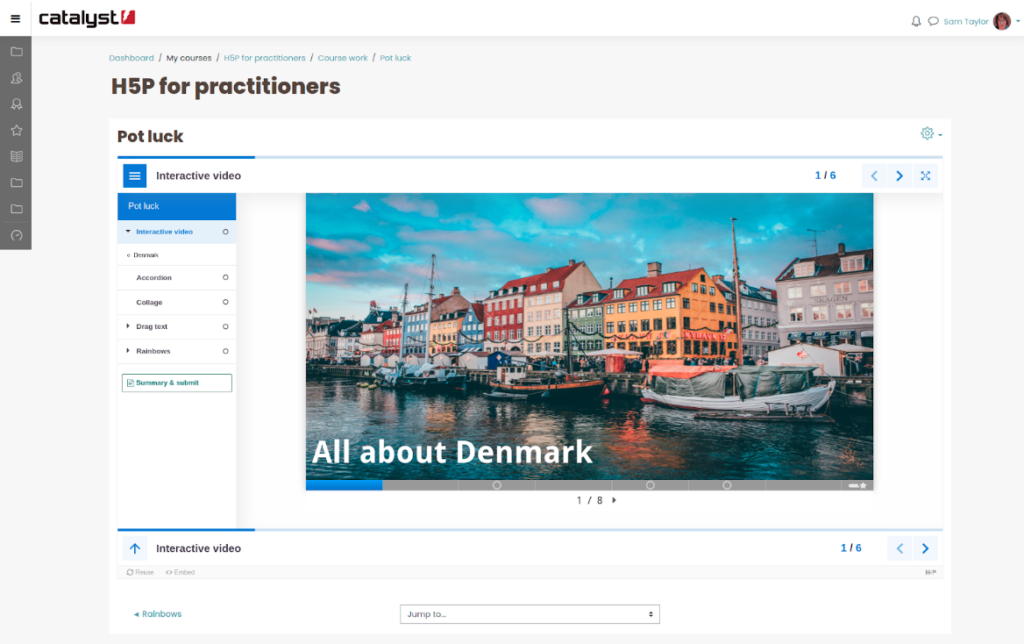
Tip 5: Install and use the H5P plugin
The H5P suite of activities facilitates multiple ways of creating engaging content for learners. You can either install the plugin or use H5P via the new content bank if you’re on a newer version of Moodle.
You can use H5P for a variety of different purposes including:
- Information transfer – their main purpose is to present content. These could include the iFrame Embedder, Accordion, Collage and Juxtaposition
- Assessment – these activities are for assessment and feedback purposes. These could include Fill in the blanks, Drag the words, and Multiple Choice Quiz
- Course work – these serve both the purpose of content delivery AND assessment purposes and are ideal for flipping your content. These could include the Presentation, Interactive Video, and personal favourite Interactive book (see image below)
If you are interested in learning more about how you can use H5P in your institution, get in touch with us as we can run a half-day workshop for you and up to 5 other colleagues. See our training packages page for more details.
Bonus tip: Explore and install different course formats
A Tiles course format is hugely popular. It’s a wonderfully smart way to present a topic, complete with progress tracking and content types on the top layer before digging deeper into what’s available.
INSERT IMAGE
There’s also the Buttons format, and then Ludic if you are looking for a more gamified layout.
As with all plugins and course formats, you need to investigate how they fit in with your accessibility requirements, so please take these into consideration when testing them out.
Next steps to improve the design of your Moodle
So there you have it, five easy ways to improve your Moodle Course appearance. If you’d like to explore how our expert team can help with consulting or implementing Moodle improvements in your organisation, get in touch today.